In the last tutorial I talked about to how to record midi into Ableton. In this tutorial we shall focus more on what settings you can use to tweak a sound of an instrument inside Ableton.
One of the first things you will need to understand is the concept of frequency and how sounds occupy a particular frequency space. A human ear in theory can distinguish sounds from 20-20000 Hz, that is the general guidance. I think with age, hearing abilities and difference in hearing between people most of the frequency above 15-16Khz is very difficult to discern for the majority of the worlds population. For example, take the bass drum. It has got tons of energy in the lower edge of the frequency spectrum (around 100hz and below depending on the kick used) and the drum also has harmonics present which have a very weak presence in the higher end of the spectrum (100-20000 Hz). Similarly the cymbals and hats occupy space starting from mid range around 4000-15000 and above. Vocals occupy most of the mid range, depending on the voice and the ability of the person to sing it can be as wide as 50-10000Hz.
The fact is for any track the kick in most cases provides the low end punch needed to drive the track. To make this tutorial easy. I am using the Classic 606 kit with a very flat sounding kick drum. how do you take this Kick drum and turn it into something punchy with a great low end presence.
For a more in depth explanation continue reading below.
When you add a drum kit inside Ableton, on top of the track view you will see a small triangle. If you click on this triangle (shown in the image below) the kit is expanded to the instruments that are present inside of it. This is needed since you will be dropping certain effects on some instruments but might not want the effect to be present on the entire kit.

Once the triangle has been clicked the kit will be expanded and you will see individual instruments in the kit as separate channels. This is shown below.
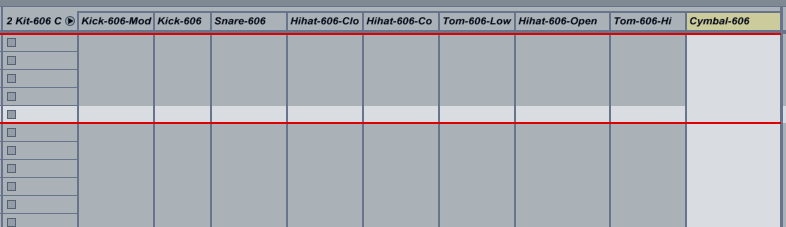
Now that you have separate channels, this becomes like any other midi channel with each one able to get separate effects apart from the sends and returns. Gives you an immense amount of options to tweak the sound.
An example of adding an EQ to the Main Kick-606 is shown below. You can then tweak the EQ and the mixer levels to get the right sound for your kick drums and the other instruments in the entire kit.

The same workflow can also be applied to other instruments. Say you have a bunch of string instruments, both audio samples and midi instruments. You can select all the tracks and group them together into a single master track called Strings and then redo the mix internally by expanding them. This whole method helps a lot when you are dealing with a lot of tracks in your productions.
Hope this tutorial helped. The next tutorial will deal with getting good sounding audio from your existing midi enabled instruments, keyboards, synthesizers, workstations etc into Ableton.
No comments:
Post a Comment